
Contents
Chào bạn,
Nếu bạn là một 1 iOS developer và đang cô đơn trong mùa Valentine này. Thì bài viết này sẽ giúp bạn cảm thấy được yêu thương nhiều hơn. Hoặc bạn có thể gởi đến người yêu thương của mình những được code thắm thiết nhất.
Đây là bài viết nâng cao hơn của bài viết về Custom View mà mình có đề cập trong serie Lập trình iOS cho mọi người. Bạn dành chút thời gian để đọc lại bài viết sau:
Còn bây giờ thì …
Bắt đầu thôi!
Chuẩn bị
- MacOS 10.14.4
- Xcode 11.0
- Swift 5.1
Tiếp theo, bạn tạo 1 iOS Project với UIKit. Dùng hay không dùng Storyboard đều được hết. Tạo mới 1 file với tên là MyHeartView. Với 1 property để tô màu cho nó.
class MyHeartView: UIView {

  var fillColor: UIColor = .red

    override func draw(_ rect: CGRect) {
      // Drawing code

    }

}
1. Extension
Vì không có các function giúp bạn vẽ, nên buộc phải tiến hành viết thêm một số extension phục vụ cho việc code.
- Int : giúp chuyển đổi từ độ sang radius
extension Int {
  var degreesToRadians: CGFloat { return CGFloat(self) * .pi / 180 }
}
- UIBezierPath : để tạo path cho hình vẽ của mình
extension UIBezierPath {

}
2. Custom Path
Tiếp tục edit BezierPath với đoạn code sau:
extension UIBezierPath {
  convenience init(heartIn rect: CGRect) {
    self.init()

    let sideOne = rect.width * 0.4
    let sideTwo = rect.height * 0.3
    let arcRadius = sqrt(sideOne*sideTwo + sideTwo*sideOne)/2

    //left hand curve
    self.addArc(withCenter: CGPoint(x: rect.width * 0.3, y: rect.height * 0.35),
                radius: arcRadius,
                startAngle: 135.degreesToRadians,
                endAngle: 315.degreesToRadians,
                clockwise: true)

    // top center dip
    self.addLine(to: CGPoint(x: rect.width/2, y: rect.height * 0.2))

    //right hand curve
    self.addArc(withCenter: CGPoint(x: rect.width * 0.7, y: rect.height * 0.35),
                radius: arcRadius,
                startAngle: 225.degreesToRadians,
                endAngle: 45.degreesToRadians,
                clockwise: true)

    // right bottom line
    self.addLine(to: CGPoint(x: rect.width * 0.5, y: rect.height * 0.95))

    self.close()

  }
}
Nguyên tắc vẽ đơn giản như thế này:
- Bên trái trước
- Vẽ 1 cung tròn với toạ độ và bán kinh như code
- Vẽ tiếp 1 đường thẳng từ mép cuối cung tròn tới điểm chính giữa bên dưới
- Lặp ngược lại với bên phải
3. Custom View
Quay về MyHeartView của chúng ta, tại function draw(rect:) Ta tiến hành vẽ
    override func draw(_ rect: CGRect) {
      // Drawing code
      let temp = [rect.width, rect.height].min() ?? 0
      let newRect = CGRect(x: rect.width/2 - temp/2, y: rect.height/2 - temp/2, width: temp, height: temp)

      // Path
      let path = UIBezierPath(heartIn: newRect)

      // set fill color
      fillColor.setFill()

      //move path
      path.apply(CGAffineTransform(translationX: newRect.origin.x, y: newRect.origin.y))

      // fill
      path.fill()
    }
Bạn thấy, nguyên tắc vẽ cũng không có gì mới
- Tạo lại vùng vẽ
- Tạo path với vùng vẽ
- Set color để tô màu
- Di chuyển path về trung tâm
- Tô màu
Để Trái tim thêm sinh động và trực quan. Ta tiến hành edit thêm class và property như sau:
@IBDesignable
class MyHeartView: UIView {

  @IBInspectable var fillColor: UIColor = .red {
    didSet {
      setNeedsDisplay()
    }
  }

    override func draw(_ rect: CGRect) {
      // Drawing code
      let temp = [rect.width, rect.height].min() ?? 0
      let newRect = CGRect(x: rect.width/2 - temp/2, y: rect.height/2 - temp/2, width: temp, height: temp)

      // Path
      let path = UIBezierPath(heartIn: newRect)

      // set fill color
      fillColor.setFill()

      //move path
      path.apply(CGAffineTransform(translationX: newRect.origin.x, y: newRect.origin.y))

      // fill
      path.fill()
    }

}
Trong đó:
@IBDesignableđể view chúng ta hiển thị được trên interface builder (hay file xib, storyboard …)@IBInspectalbeđể kết nối property với file giao diện. Nghĩa là khi ta thay đổi giá trị các thuộc tính, thì đồng thời giao diện cũng sẽ theo tự động thay đổi theo.
Mục đích xem Custom View một cách trực quan nhất.
Bước cuối, tiến hành thêm trên giao diện như các UI Control của Xcode
- Kéo thả 1 UIView vào giao diện
- Thay đổi class của UIView thành
MyHeartView

- Tuỳ chỉnh
framevàfillColor
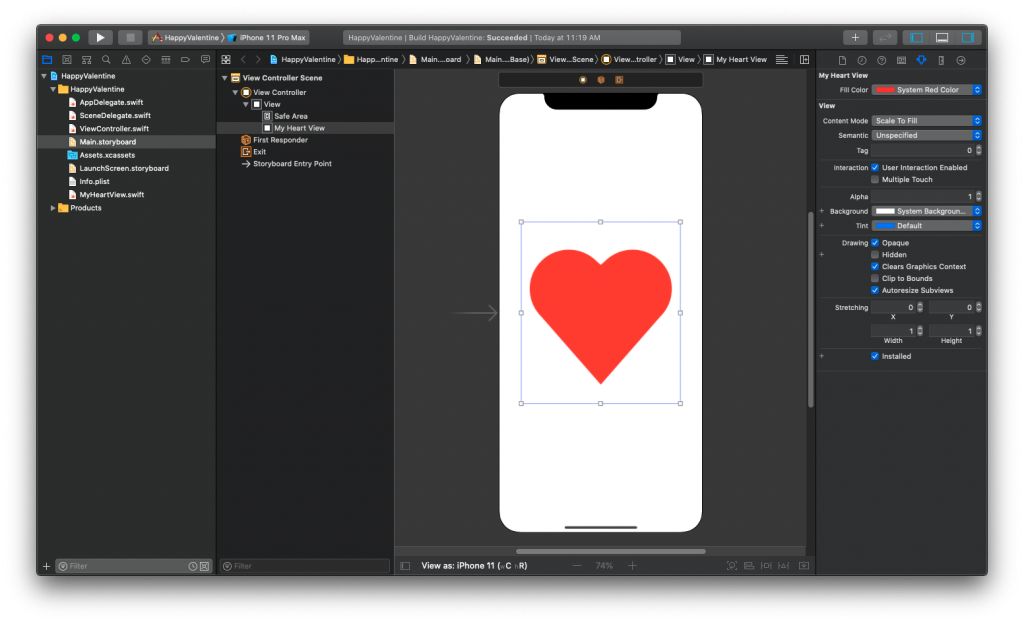
Vậy là rất nhanh chóng. Bạn có thể tự tạo 1 custom view trong mùa Valentine này rồi. Chúc bạn sớm thoát được kiếp FA. Bạn có thể xem lại tutorial qua video sau:
Cảm ơn bạn đã đọc bài viết này!
Tạm kết
- Custom UIBezierPath
- IBDesignable
- IBInspecable
Leave a Reply
Donate – Buy me a coffee!
