
Contents
Chào bạn, chúng ta lại tiếp tục seri Lập trình iOS cho mọi người. Chủ đề bài viết này sẽ liên quan tới việc hiển thị một danh sách, nhưng không sử dụng TableView. Đó là Collection View.
Và nếu bạn chưa tìm hiểu về TableView thì bạn có thể đọc qua 2 bài viết sau:
Mọi thứ đã okay thì …
Bắt đầu thôi!
Chuẩn bị
- MacOS 10.14.4
- Xcode 11.0
- Swift 5.1
1. Giới thiệu Collection View
1.1. Collection View
Khi bạn chán hiển thị một danh sách theo từng dòng (TableView) thì còn một dạng khác. Đó là dạng các ô lưới. Đây cũng là dạng phổ biến. Tuy nhiên, nó xuất hiện khá muộn trong iOS (từ iOS 6 trở đi). Và apple gọi nó là Collection View.
An object that manages an ordered collection of data items and presents them using customizable layouts.
Theo Apple.
Ta có thể bắt gặp Collection View ở các UI của một số ứng dụng cơ bản trong iOS.
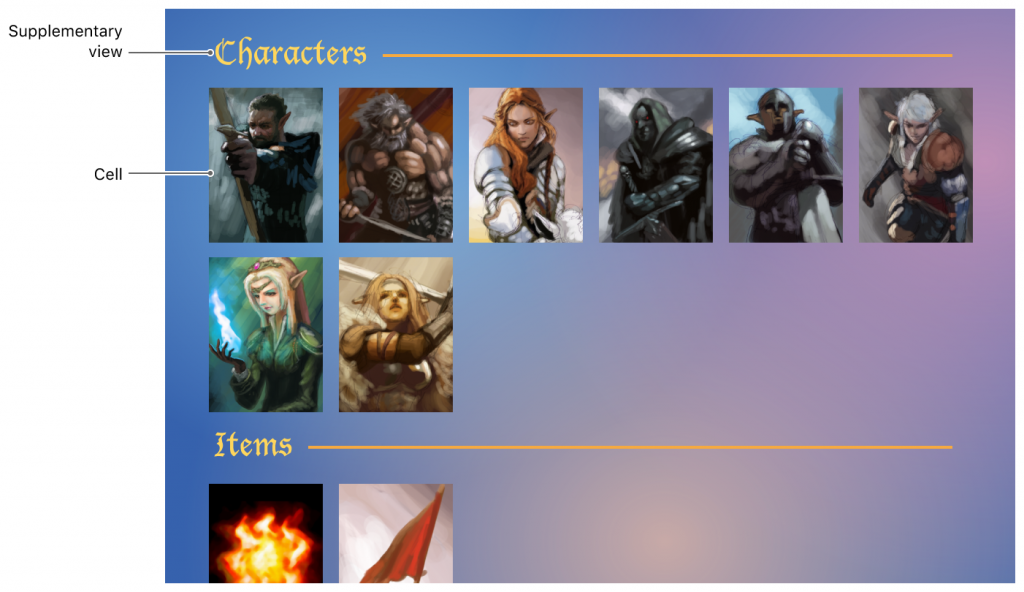
- Collection View hiển thị danh sách dữ liệu thành dạng ô, bao gồm: hàng và cột.
- So với TableView, Collection View linh hoạt và dễ thay đổi hơn.
- Tương tự TableView, Collection View được tạo bởi không hoặc nhiều section, mỗi section sở hữu nhiều item. Mỗi section có thể có section header và section footer
1.2. Cấu trúc
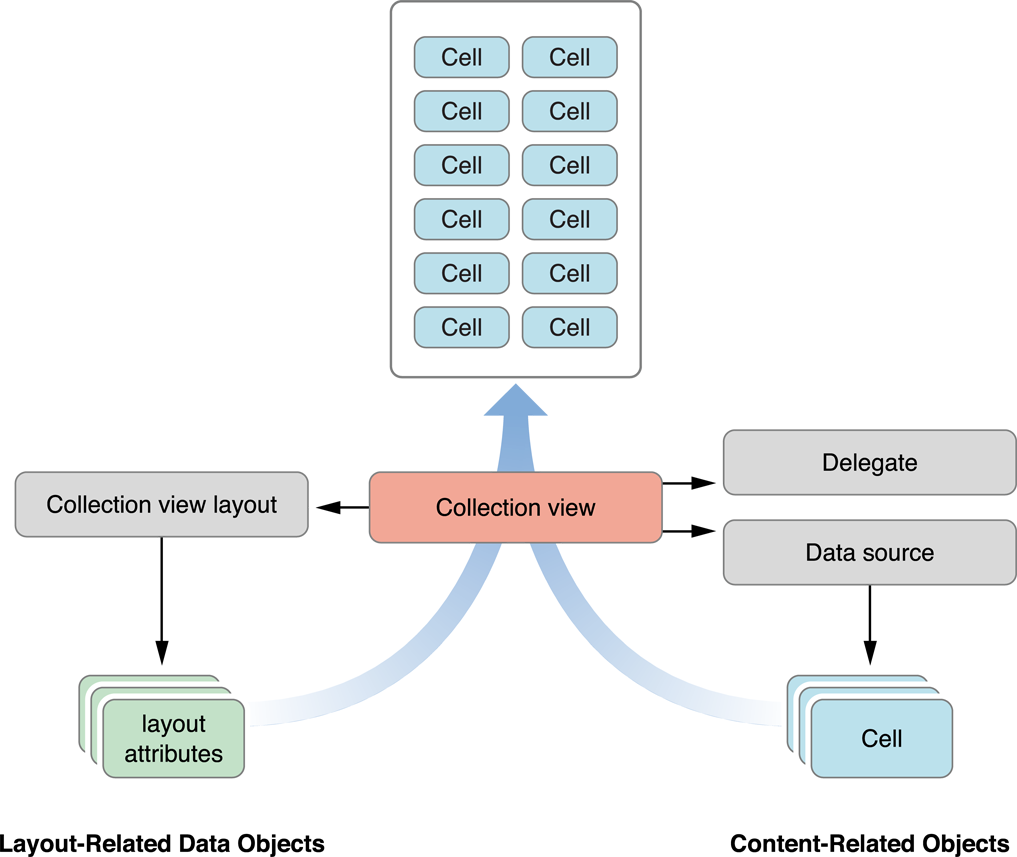
UICollectionView là subclass của UIScrollView, nên nó cho phép người dùng cuộn table. UICollectionView cho phép cuộn theo cả hai chiều.
1.2.1. Cell
- Thành phần thể hiện các item trên collection view là những đối tượng của lớp
UICollectionViewCell. - Đối tượng UICollectionView phải cần đối tượng hoạt động như một
data sourcevàdelegate.- Data source: nhận protocol UICollectionViewDataSource, cung cấp thông tin cần thiết cho việc xây dựng collection và quản lý dữ liệu khi một item được thêm vào, xoá hay sắp xếp lại.
- Delegate: nhận protocol UICollectionViewDelegate, quản lý việc config hoặc lựa chọn item, sắp xếp lại item, highlight, trang trí view và các thao tác thay đổi khác.
1.2.2. Layout
- Một đối tượng vô cùng quan trọng đối với việc xây dựng collection view là đối tượng layout, là subclass của lớp
UICollectionViewLayout. - Đối tượng này có nhiệm vụ khai báo cách sắp xếp và vị trí của tất cả các cell, cũng như các view bổ trợ cho việc xây dựng collection view như: header, footer,…
- Thay đổi layout của collection bằng cách thay đổi thuộc tính collectionViewLayout, cài đặt thuộc tính này sẽ trực tiếp cập nhật layout ngay lập tức, mà không có hiệu ứng chuyển đổi.
- Thay vào đó nếu muốn cấu hình hiệu ứng chuyển đổi, chúng ta phải sử dụng phương thức
setCollectionViewLayout(_:animated:completion:)
2. Tạo Collection View
Tạo 1 project không sử dụng Storyboard. Trong đó:
- 1 UIViewController
- Add 1 UICollectionView vào View của Controller
- Tạo
IBOutletcho UICollectionView
- Tạo

Kéo thả các delegate và data source của UICollectionView cho ViewController
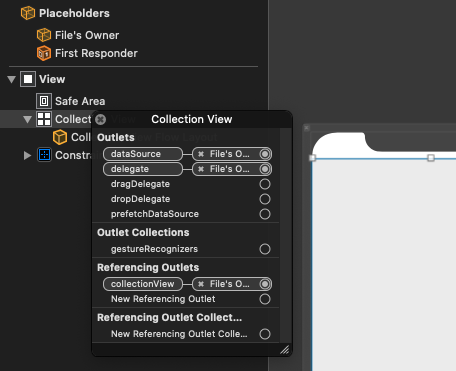
Hoặc bạn có thể xét trực tiếp bằng code.
override func viewDidLoad() {
        super.viewDidLoad()
        title = "Home"

        collectionView.delegate = self
        collectionView.dataSource = self
    }
Tiếp tục, tạo mới class User để làm dữ liệu cho Collection View
- Có 1 static function để cung cấp dữ liệu giả (dummy datas) cho ViewController
import Foundation

final class User {
    var name: String
    var avatar: String

    init(name: String, avatar: String) {
        self.name = name
        self.avatar = avatar
    }
}

extension User {
    static func getDummyDatas() -> [User] {
        var users: [User] = []

        for i in 1...30 {
            let user = User(name: "User \(i)", avatar: "\(i%10)")
            users.append(user)
        }

        return users
    }
}
Tại file HomeViewController.swift, thêm 1 property là users. Để chứa dữ liệu cho CollectionView
var users: [User] = User.getDummyDatas()
Tới đây, thì cơ bản đã xong phần chuẩn bị dữ liệu cho Collection View. Giờ chuyển sang phần tạo cell
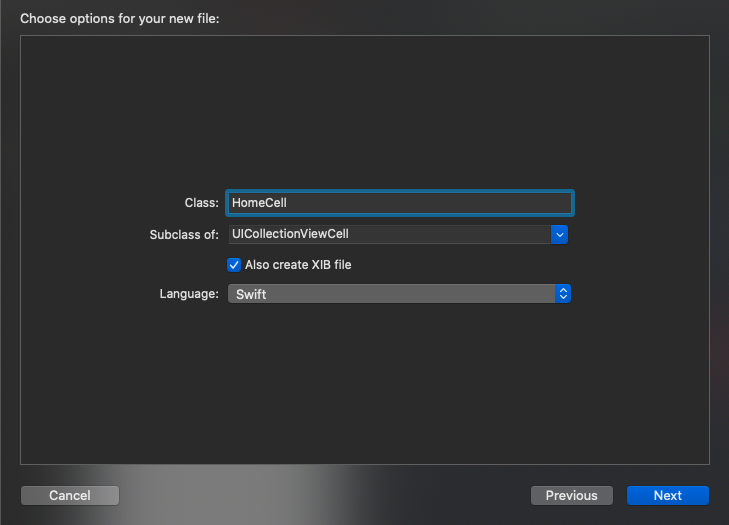
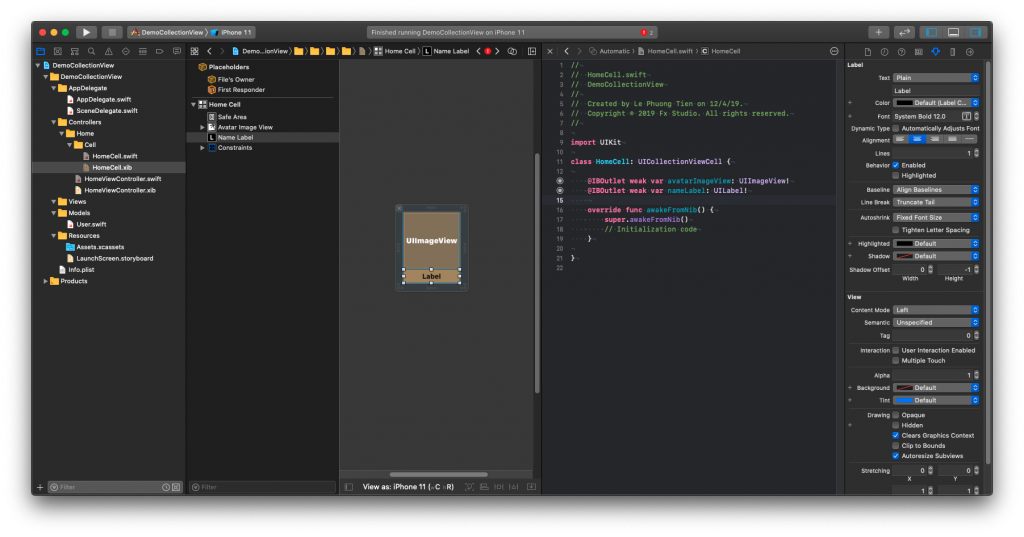
3. Custom Collection View Cell
Tạo mới một cell với tên là HomeCell, kế thừa từ UICollectionViewCell
Tiến hành kéo thả giao diện và tạo các outlet cho cell
- avatarImageView : cho ảnh hiển thị
- nameLabel : cho tên hiển thị
Quay về file HomeViewController.swift, tiến hành một số các thủ tục sau:
- Bước 1 : register cell (tương tự như cách register của TableViewCell)
let nib = UINib(nibName: "HomeCell", bundle: .main)
collectionView.register(nib, forCellWithReuseIdentifier: "cell")
- Bước 2: tạo extention. Có 2 function quan trọng nhất
numberOfItemInSectionsố lượng các item cho section của Collection View- Mặc định nếu không có định nghĩa lại function
numberOfSection, thì mặc định có 1 section
- Mặc định nếu không có định nghĩa lại function
cellForItemAt IndexPath- Tương tự Tableview
- Sử dụng hàm
dequeue, để lấy ra 1 cell vớiindexPathvàreuser identifier - Ép kiểu cell đó về
HomeCell - Lấy 1 phần tử ra từ array dữ liệu
- Cập nhật dữ liệu cho cell
- Return cell đó
extension HomeViewController: UICollectionViewDelegate, UICollectionViewDataSource {
    func collectionView(_ collectionView: UICollectionView, numberOfItemsInSection section: Int) -> Int {
        users.count
    }

    func collectionView(_ collectionView: UICollectionView, cellForItemAt indexPath: IndexPath) -> UICollectionViewCell {
        let cell = collectionView.dequeueReusableCell(withReuseIdentifier: "cell", for: indexPath) as! HomeCell

        let item = users[indexPath.row]
        cell.nameLabel.text = item.name
        cell.avatarImageView.image = UIImage(named: item.avatar)

        return cell
    }
}
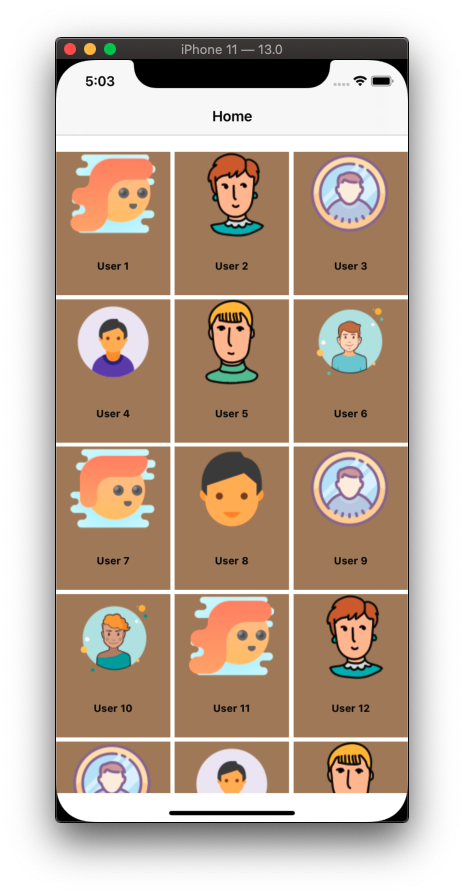
Kết quả như sau:
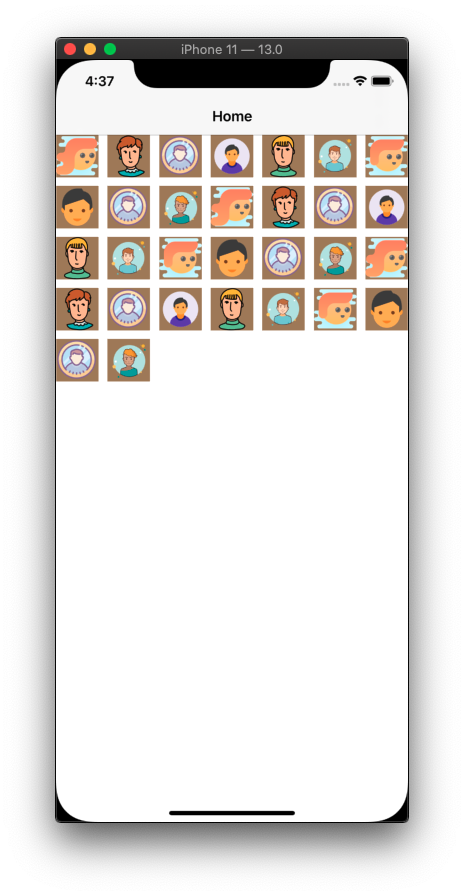
Tới đây, thì chúc mừng bạn đã xong việc tạo 1 Collection View đơn giản. Tuy nhiên, bạn sẽ thấy là
nameLabelđã biến mất. Và cell lại hình vuông. Vậy tiếp tục giải quyết phần tiếp theo của Collection View làlayout.
4. Cell Layout
4.1. Tuỳ chỉnh tại file giao diện
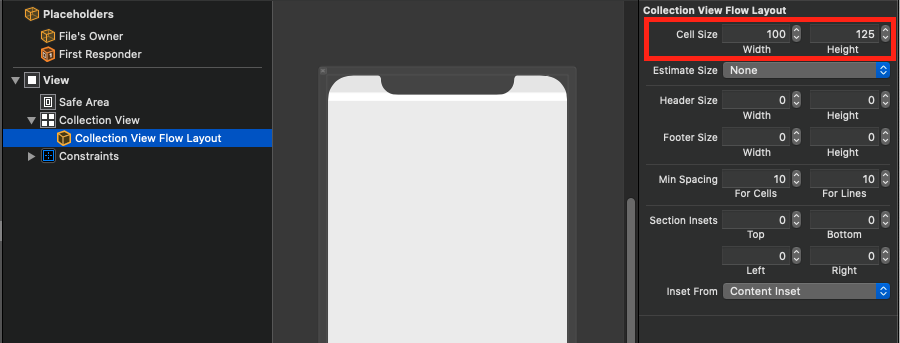
Mở file HomeViewController.swift, chọn Collection View Flow Layout. Và tiến hành điều chỉnh
- Cell size là kích thước của cell
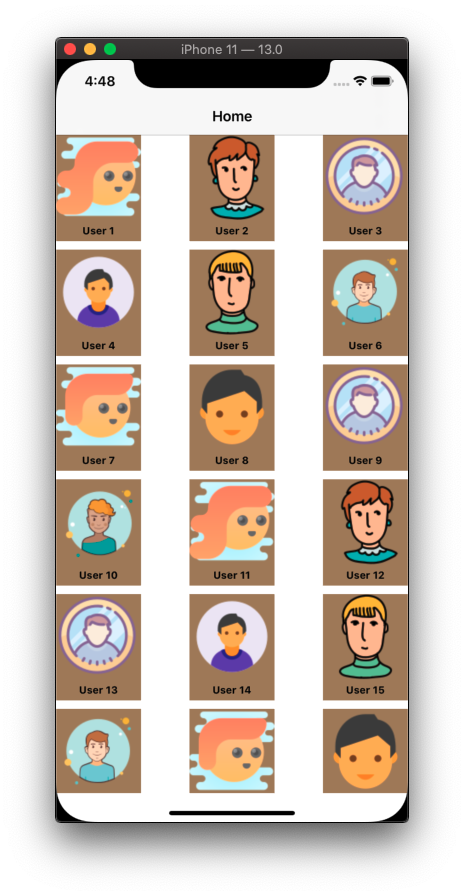
Kết quả như sau:
Đôi lúc, chúng ta muốn code và nó sẽ linh hoạt hơn, đẹp hơn. Thì sang cách thứ 2, là tuỳ chỉnh
layoutbằng code.
4.2. Code cell layout
4.2.1 UICollectionViewFlowLayout
Sử dụng 1 đối tượng UICollectionViewFlowLayout, xét nó cho Collection View. Tham khảo đoạn code sau:
- Lấy giá trị của chiều ngang màn hình
- Tạo đối tượng
layout- Cách mép trên 20px, mép dưới 10px
- Kích thước bằng 1/3 màn hình
- Các khoảng cách là 5px
- Xét cho thuộc tính
collectionViewLayout, của Collection View
        //1
        let screenWidth = UIScreen.main.bounds.width - 10
        //2
        let layout: UICollectionViewFlowLayout = UICollectionViewFlowLayout()
        layout.sectionInset = UIEdgeInsets(top: 20, left: 0, bottom: 10, right: 0)
        layout.itemSize = CGSize(width: screenWidth/3, height: (screenWidth/3)*5/4)
        layout.minimumInteritemSpacing = 5
        layout.minimumLineSpacing = 5
        //3
        collectionView!.collectionViewLayout = layout
Kết quả như sau:
4.2.2. Delegate UICollectionViewDelegateFlowLayout
Đây là một cách khác để custom layout của Collection View, mà không cần xét trực tiếp đối tượng layout như ở trên. Đó là dùng delegate của FlowLayout.
Tiến hành implement các function của delegate UICollectionViewDelegateFlowLayout. Trong đó một số hàm cần thiết như sau:
sizeForItem: kích thước của cellminimunLineSpacing&minimunInteritem: cho các khoảng cánh
func collectionView(_ collectionView: UICollectionView, layout collectionViewLayout: UICollectionViewLayout, sizeForItemAt indexPath: IndexPath) -> CGSize {
        let screenWidth = UIScreen.main.bounds.width - 10
        return CGSize(width: screenWidth/3, height: (screenWidth/3)*5/4)
    }

    func collectionView(_ collectionView: UICollectionView, layout collectionViewLayout: UICollectionViewLayout, minimumLineSpacingForSectionAt section: Int) -> CGFloat {
        return 5
    }


    func collectionView(_ collectionView: UICollectionView, layout collectionViewLayout: UICollectionViewLayout, minimumInteritemSpacingForSectionAt section: Int) -> CGFloat {
        return 5
    }
Kết quả như sau:
5. Collection View Header
Đối với dạng danh sách nhiều chiều, thì chúng ta sẽ sử dụng việc hiển thị theo từng section. Trong TableView, thì các header và footer của TableView là các UIView. Còn với Collection View, thì chúng được gọi là supplementary view. Và class đại diện cho chúng là UICollectionReusableView.
Nó cũng tương tự như UICollectionViewCell, chúng ta phải thực hiện công việc custom chúng. Công việc này cũng tương tự như việc custom cell. Bây giờ, thì bắt đầu bằng việc tạo ra 1 Header cho Section của Collection View.
Tạo mới một file với tên là HomeHeaderView, kế thừa từ class UICollectionReusableView
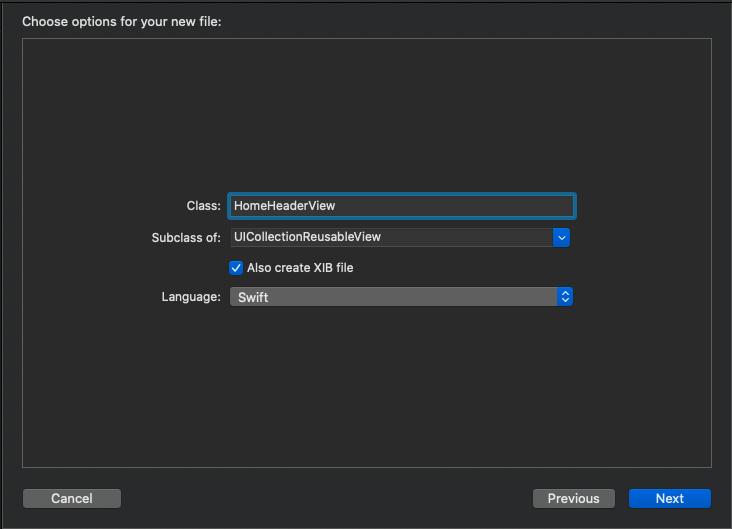
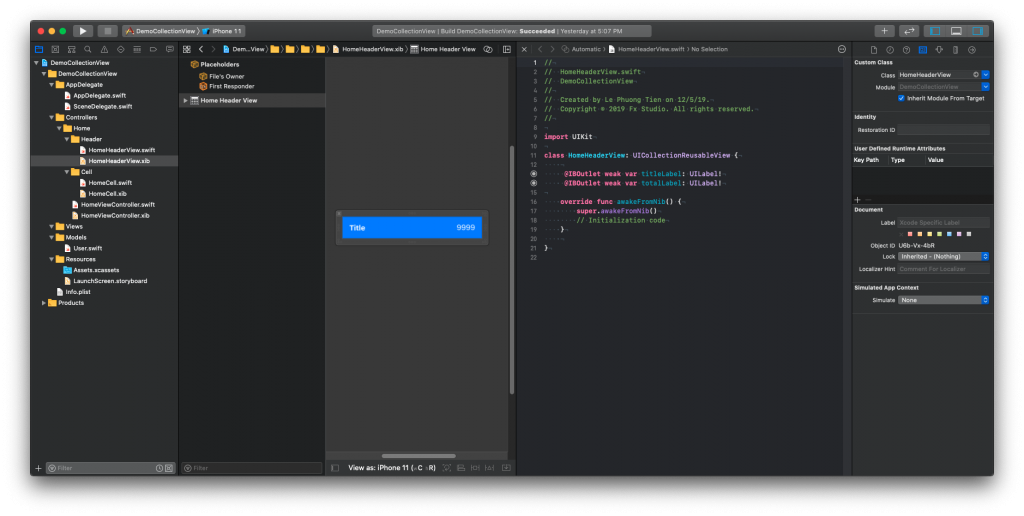
Tiến hành kéo thả giao diện, tạo các outlet.
Mở file HomeViewController.swift, tiến hành các bước sau:
- Bước 1: register header
- Header là một
supplementary view, nên phải chọn function register cho phù hợp - Kiểu là
UICollectionView.elementKindSectionHeader - Re-use identifier là
header
- Header là một
let headerNib = UINib(nibName: "HomeHeaderView", bundle: .main)
collectionView.register(headerNib, forSupplementaryViewOfKind: UICollectionView.elementKindSectionHeader, withReuseIdentifier: "header")
- Bước 2: implement các function để load header view
referenceSizeForHeaderInSection: xác định kích thước của header viewviewForSupplementaryElementOfKind: return về 1 supplementary view phù hợp- Sẽ có các kiểu là
headerhoặcfooter, nên cần phải lựa chọn cho phù hợp - Xét các thuộc tính cho header
   func collectionView(_ collectionView: UICollectionView, layout collectionViewLayout: UICollectionViewLayout, referenceSizeForHeaderInSection section: Int) -> CGSize {
        return CGSize(width: collectionView.frame.width, height: 50)
    }

    func collectionView(_ collectionView: UICollectionView, viewForSupplementaryElementOfKind kind: String, at indexPath: IndexPath) -> UICollectionReusableView {

        switch kind {
        case UICollectionView.elementKindSectionHeader:
               let reusableview = collectionView.dequeueReusableSupplementaryView(ofKind: UICollectionView.elementKindSectionHeader, withReuseIdentifier: "header", for: indexPath) as! HomeHeaderView

               reusableview.frame = CGRect(x: 0 , y: 0, width: self.view.frame.width, height: 50)

               reusableview.titleLabel.text = "Users"
               reusableview.totalLabel.text = "\(users.count)"

                return reusableview
        default:
            fatalError("Unexpected element kind")
        }
    }
Kết quả sau khi thực thi:
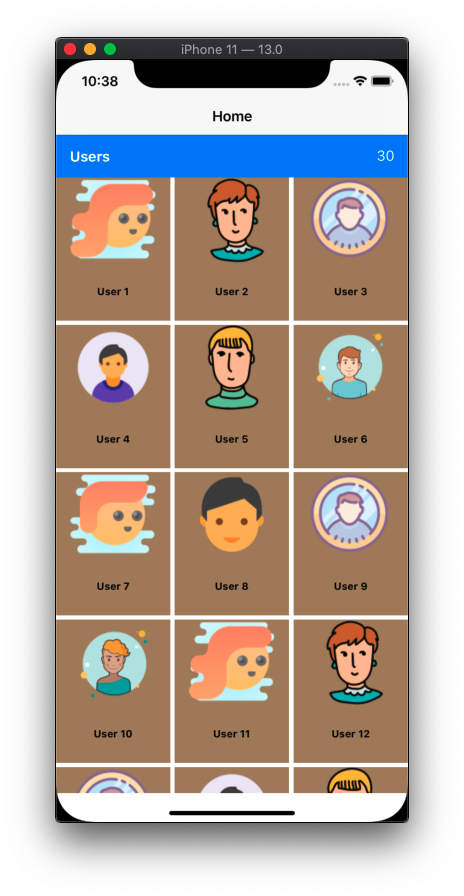
Tới đây, thì bạn đã hoàn thành xong việc sử dụng 1 Collection View ở mức độ cơ bản. Còn rất nhiều kĩ thuật hay xử lý nâng cao, cũng như custom layout nâng cao cho layout của Collection View. Hẹn bạn ở 1 bài viết với cấp độ nâng cao nhiều hơn.
Tạm kết
- Tìm hiểu về Collection View
- Cấu trúc
- Tạo 1 Collection View đơn giản
- Custom Cell layout
- Custom Header/Footer
Cảm ơn bạn đã theo dõi bài viết này!
Related Posts:

Leave a Reply
Donate – Buy me a coffee!
