
Contents
Chào bạn đến với Fx Studio. Bài viết hôm nay trình bày về một dạng mới của Data Source trong Collection View. Đó là Diffable Data Source.
Nếu bạn chưa biết về Collection View thì có thể đọc qua bài viết sau:
Vâng, đó là bài viết cơ bản nhất để sử dụng Collection View trong iOS. Còn bây giờ thì …
Bắt đầu thôi!
Chuẩn bị
- Xcode 11.0
- Swift 5.1
- iOS 13.0
Vì Diffable Data Source là API mới nhất của iOS nên bạn bắt buộc sử dụng các version iOS mới để được hỗ trợ đầy đủ. Và minh hoạ đầy đủ cho code thì chúng ta ưu tiên sử dụng project không dùng Storyboard. Dành cho một số bạn quên mất cách tạo project không sử dụng Storyboard thì có thể tham khảo ở đây.
Chúng ta sẽ có 1 ViewController và 1 UICollectionView. Tiến hành custom cell và header view của nó. Nội dung tuỳ ý bạn sáng tạo.
1. Hash Model
Bước đầu tiên, chúng ta sẽ tiến hành setup dữ liệu và kiểu dữ liệu cần thiết cho chương trình của chúng ta.
1.1. Section
Thay vì cách truyền thống, các Section sẽ được implement vào code thông qua các protocols của UICollectionViewDataSource. Lần này, chúng ta sẽ khai báo 1 kiểu dữ liệu mới cho nó. Bạn mở file HomeViewController và tiến hành khai báo như sau:
enum Section {
    case main
}
Vì mình sử dụng một section, nên chỉ khai báo 1 case. Nếu bạn sử dụng nhiều thì có thể khai báo nhiều hơn.
1.2. Model
Sang bước tiếp theo, bạn cần khai báo kiểu dữ liệu cho cung cấp cho Diffable Data Source mới. Chúng ta cần một lớp Flower, với các thuộc tính cơ bản:
nametên loài hoadescriptionmô tả loài hoaimageNametên file ảnh của nó, được chứa trong Assets (mình làm đơn giản thôi)
class Flower {

  var name: String
  var description: String
  var imageName: String

  init(name: String, description: String, imageName: String) {
    self.name = name
    self.description = description
    self.imageName = imageName
  }

}
Bây giờ, tới phần nâng cấp Model của bạn nào.
class Flower: Hashable {

  var id = UUID()
  var name: String
  var description: String
  var imageName: String

  init(name: String, description: String, imageName: String) {
    self.name = name
    self.description = description
    self.imageName = imageName
  }

  // Hash
  func hash(into hasher: inout Hasher) {
    hasher.combine(id)
  }

  static func == (lhs: Flower, rhs: Flower) -> Bool {
    lhs.id == rhs.id
  }

}
Bạn sẽ thấy, Flower kế thừa thêm protocol Hashable. Thì nó giúp bạn cho phép nguồn dữ liệu có thể khuếch tán, thực hiện cập nhật, thêm, xoá …vào CollectionView thông qua Diffable Data Source.
Và tất nhiên, đời đâu phải đơn giản như vậy. Bạn cần tiến hành thêm các functions sau vào Model của bạn:
idmột kiểu gì đó mà giúp đối tượng của bạn là duy nhất trong 1 Array hay Set. Sử dụngUUID(), để tự động sinh ra 1 mã duy nhất và không trùng lặpfunc hash(into hasher: inout Hasher)dùng xác địnhhashsẽ dùng trường nào để phân biệt. Tất nhiên, chúng ta chọnid.- Custom thêm cái dấu
==để dễ so sánh 2 đối tượng với nhau
Bạn viết thêm function để cung cấp dữ liệu cho Collection View của chúng ta (dữ liệu giả). Và bạn mở HomeViewController, khai báo thuộc tính cho dữ liệu với Model Flower
var flowers = Flower.allFlowers()
Trong đó, allFlowers() là function dummy data cho ví dụ demo này. OKAY, giờ thì bạn
Sang phần chính nào!
2. Diffable Data Source
Chúng ta có một số lưu ý trước khi làm như sau, để bạn không phải bất ngờ:
- Đó là API mới nhất của Apple
- Khó cài đặt và sử dụng hơn so với
UICollectionViewDataSource - Dễ nhầm lẫn, chết chương trình
Tuy nhiên, nó mang lại cho chúng ta:
- Một trải nghiệm mới chuyên nghiệp hơn
- Không cần quan tâm nhiều tới các protocol
- Mọi thứ giờ chính là dữ liệu của bạn sẽ quyết định
- Tiến gần hơn các nền tảng lập trình mới
- Có thể đây là bước chuyển mình tiếp theo của Apple với iOS và Swift.
2.1. Define
Vì mỗi lần khai báo thì tên class rất dài, nên chúng ta tạm thời định danh lại cho nó
typealias DataSource = UICollectionViewDiffableDataSource<Section, Flower>
Trong đó:
UICollectionViewDiffableDataSourcelà thèn mà chúng ta cần giết- Cung cấp kiểu cho
sectionvàitem
2.2. Config
Tiến hành tạo DataSource mới nào. Thêm function sau vào HomeViewController
func makeDataSource() -> DataSource {
    let dataSource = DataSource(
      collectionView: collectionView,
      cellProvider: { (collectionView, indexPath, flower) -> UICollectionViewCell? in

        let cell = collectionView.dequeueReusableCell(withReuseIdentifier: "cell", for: indexPath) as? HomeCell
        cell?.nameLabel.text = flower.name
        cell?.thumbImageView.image = UIImage(named: flower.imageName)
        return cell
    })

    return dataSource
  }
Bạn sẽ bắt gặp những hình ảnh quen thuộc khi xưa
- Tạo đối tượng
dataSourcevới việc cung cấp cho nó 2 giá trị- collectionView chính là Collection View nào bạn muốn áp dụng vào
- cellProvider các cell mà bạn cung cấp
- Dễ hiểu thì đây giống như function
collectionView(_:cellForItemAt:) - Nó cũng hỗ trợ luôn function của DataSource trước đây là
collectionView(_:numberOfItemsInSection:)
Vẫn là file HomeViewController, bạn tiến hành định nghĩa thêm thuộc tính dataSource.
private lazy var dataSource = makeDataSource()
Chọn lazy để lúc nào cần thì nó sẽ khởi tạo. Chúng ta đã xong phần setup cho Diffable Data Source, tiếp theo là setup cho giao diện.
3. Layout
Thêm một function để tiến hành config layout cho Collection View.
func configureLayout() {

    //1
    collectionView.delegate = self

    //2
    let nib = UINib(nibName: "HomeCell", bundle: .main)
    collectionView.register(nib, forCellWithReuseIdentifier: "cell")

    //3
    let headerNib = UINib(nibName: "HomeHeaderView", bundle: .main)
    collectionView.register(headerNib,
                            forSupplementaryViewOfKind: UICollectionView.elementKindSectionHeader,
                            withReuseIdentifier: "header")

    //4
    let screenWidth = UIScreen.main.bounds.width - 20

    let layout: UICollectionViewFlowLayout = UICollectionViewFlowLayout()
    layout.sectionInset = UIEdgeInsets(top: 20, left: 5, bottom: 10, right: 5)
    layout.itemSize = CGSize(width: screenWidth/2, height: screenWidth/2)
    layout.minimumInteritemSpacing = 5
    layout.minimumLineSpacing = 5
    layout.scrollDirection = .vertical

    //5
    collectionView!.collectionViewLayout = layout

  }
Mình sẽ giải thích các phần sau:
-
- Xét
delegatecho Collection View, để đảm bảo việc bạn khỏi quên kéo thả trong*.xib - Register cell cho Collection View với identifier là
cell - Tương tự register cho Header với identifier là
header - Tạo và xét các thuộc tính của đối tượng
layout - Gán
layoutmới cho Collection View
- Xét
Phần này, bạn tham khảo thêm trên mạng để có thể tạo layout đẹp hơn. Ngoài ra, bạn vẫn có thể sử dụng protocol UICollectionViewDelegateFlowLayout để tạo layout cho Collection View.
Tìm tới function viewDidLoad và gọi function configureLayout. Xong bạn tiến hành build và xem kết quả nào.

Tin vui là không chết chương trình, nhưng tin buồn là không hiển thị gì hết. Bạn đừng lo lắng, giờ sang phần tiếp theo để load dữ liệu lên nào.
4. Snapshot
Nó là thèn nào?
Hiểu đơn giản thì NSDiffableDataSourceSnapshot, giúp bạn
- Lưu trữ các section và item
- Diffable Data Source có thể tham chiếu tới và hiển thị chúng lên cell
4.1. Define
Tương tự như trên, cần phải định danh mới để dễ sử dụng, do cái tên nó dài quá xá. Bạn mở HomeViewController và khai báo
typealias Snapshot = NSDiffableDataSourceSnapshot<Section, Flower>
Snapshot cũng cần kiểu dữ liệu cho Section và Item, nên bạn vẫn phải cung cấp cho nó.
4.2 Config
Thêm function sau để cấu hình cài đặt cho snapshot
func applySnapshot(animatingDifferences: Bool = true) {
    var snapshot = Snapshot()

    snapshot.appendSections([.main])
    snapshot.appendItems(flowers)

    dataSource.apply(snapshot, animatingDifferences: animatingDifferences)
  }
Trong đó:
appendSectionslà thêm section. Muốn bao nhiêu section thì thêm bấy nhiêuappendItemslà thêm các items cho section. Nếu nhiều section, thì thêm nhiều lần và chỉ ra thêm vào section nào nữaanimatingDifferencesđể xác nhận có thay đổi nguồn dữ liệu hay không (mình không chắc chắn chỗ này nhiều lắm)applyáp dụng snapshot chodataSourcemới
Và cũng gọi function này tại viewDidLoad, sau đó bạn tiến hành build và cảm nhận kết quả.

Đẹp rồi! Nhưng công việc của bạn vẫn còn đây.
5. Section
Chúng ta tiếp tục với việc hiển thị Section lên nào.
5.1. Define
Vì chúng ta đã register header rồi. Nên sang bước tạo layout cho Header. Bạn tới function configureLayout, hoàn thiện nó với layout của header
func configureLayout() {

    //delegate
    collectionView.delegate = self

    //register cell
    let nib = UINib(nibName: "HomeCell", bundle: .main)
    collectionView.register(nib, forCellWithReuseIdentifier: "cell")

    //register header
    let headerNib = UINib(nibName: "HomeHeaderView", bundle: .main)
    collectionView.register(headerNib,
                            forSupplementaryViewOfKind: UICollectionView.elementKindSectionHeader,
                            withReuseIdentifier: "header")

    //layout
    let screenWidth = UIScreen.main.bounds.width - 20
    // for items
    let layout: UICollectionViewFlowLayout = UICollectionViewFlowLayout()
    layout.sectionInset = UIEdgeInsets(top: 20, left: 5, bottom: 10, right: 5)
    layout.itemSize = CGSize(width: screenWidth/2, height: screenWidth/2)
    layout.minimumInteritemSpacing = 5
    layout.minimumLineSpacing = 5
    layout.scrollDirection = .vertical

    // for header
    layout.sectionHeadersPinToVisibleBounds = false
    layout.headerReferenceSize = CGSize(width: screenWidth, height: 50)

    collectionView!.collectionViewLayout = layout

  }
EZ Game! Sang tiếp phần config Diffable Data Source với phần header nào.
5.2. Config
Tời function makeDataSource và hoàn thiện nó
func makeDataSource() -> DataSource {
    let dataSource = DataSource(
      collectionView: collectionView,
      cellProvider: { (collectionView, indexPath, flower) -> UICollectionViewCell? in

        let cell = collectionView.dequeueReusableCell(withReuseIdentifier: "cell", for: indexPath) as? HomeCell
        cell?.nameLabel.text = flower.name
        cell?.thumbImageView.image = UIImage(named: flower.imageName)
        return cell
    })

    //header
    dataSource.supplementaryViewProvider = { collectionView, kind, indexPath in
      guard kind == UICollectionView.elementKindSectionHeader else {
        return nil
      }

      let view = collectionView.dequeueReusableSupplementaryView(ofKind: kind, withReuseIdentifier: "header", for: indexPath) as? HomeHeaderView
      view?.titleLabel.text = "main flowers"
      view?.totalLabel.text = "\(self.flowers.count)"
      return view
    }

    return dataSource
  }
Bạn lại bắt gặp hình ảnh quen thuộc sau
dequeueReusableSupplementaryViewđó chính là protocol trước đây bạn sử dụng
Ngại ngùng gì nữa? Build và xem kết quả nào!
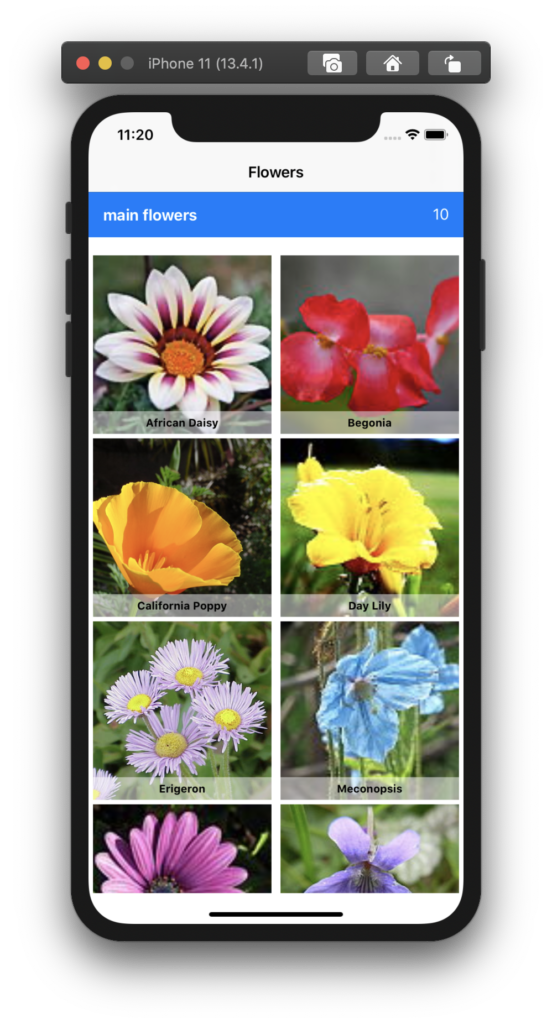
Bạn sẽ tuỳ ý cho title của section nha. Các nội dung khác Header cũng tương tự như vậy.
6. Delegate
Chúng ta quên mất em này, code truyền thống như sau:
- Tạo
extentioncho UICollectionViewDelegte - Định nghĩa lại
didSelectedItemAt - Lấy item theo
indexPath - Sử dụng chúng
extension HomeViewController: UICollectionViewDelegate {

  func collectionView(_ collectionView: UICollectionView, didSelectItemAt indexPath: IndexPath) {

    let item = flowers[indexPath.row]

    print("Selected flower : \(item.name)")

  }

}
Giờ thời đại mới rồi, nên chúng ta sẽ có cách khác
func collectionView(_ collectionView: UICollectionView, didSelectItemAt indexPath: IndexPath) {
    guard let item = dataSource.itemIdentifier(for: indexPath) else {
      return
    }

    print("Selected flower : \(item.name)")
  }
Bạn sẽ thấy dataSource.itemIdentifier(for: indexPath) giúp bạn lấy được item. Và bây giờ mọi thứ bạn quan tâm sẽ chính là dataSource.
OKAY! Mình kết thúc bài viết tại đây. Bạn có thể download mã nguồn của project demo tại link này. Chúc bạn thành công!
Tạm kết
- Cách sử dụng Diffable Data Source
- Cài đặt và áp dụng cách mới thay thế cho các protocol DataSource trước đây
Nếu có góp ý gì, thì bạn có thể để lại reply hoặc send contact cho mình. Còn nếu thấy hay thì hãy share cho nhiều người khác cùng đọc.
Cảm ơn bạn đã đọc bài viết này!
2 comments
Leave a Reply
Donate – Buy me a coffee!

Anh ơi anh làm nốt các thao tác khác đi ạ:
+ Thêm lẻ item
+ Sửa item
+ Xoá item
+ Multiselect cell
Okay em, nhưng chắc cũng lâu tí đó em à. Vì đang viết bài cho series mới. Để note lại sau em nhoé!